


How to Draw A Necklace. When it comes to fashion, there are many accessories that you can use to create a unique style. There are things like earrings, rings, and shoes that you can wear, but one of the most popular items is a necklace.
Also, check our Cat Coloring Pages.
Necklaces can be incredibly diverse, and there will surely be a necklace for every style and taste. It can be a lot of fun imagining your perfect necklace accessory, and learning how to design a necklace can be a great place to start if you do! If you want to release your inner stylist, this tutorial is for you!
How to Draw A Necklace
Step 1
This tutorial on drawing a necklace will have room for your designs later, but let’s stick with the drawing we have prepared in this tutorial. This necklace will have beautiful sections of beads all along the way, and now we will design the first of them.
Start drawing curved lines to create a rounded shape with two sharp points at the top and bottom. This will create a sort of leaf shape for the bead, which you can then draw a smaller replica of that shape into. Once this has been drawn, you can add more in the next few steps!
Step 2
Now that you’ve drawn the first bead sections for this necklace design, it’s time to add more! In this second step of the tutorial, you’ll draw two more leaf-shaped sections.
There will be one on each side of the first one, which means using curved lines with sharp points at the top and bottom. They’re about the same size as the first one, but the corners are a bit more diagonal, as shown in the reference image.
Step 3
In this third section of our guide to designing a necklace, we will add two more sections. Again, create the same bead shape that you used for the first beads and those in the second step. Like the second pair of beads, these also have a slightly diagonal angle.
These will be further differentiated as they will be slightly smaller than previous bead sets. Other than that difference, they’re pretty much the same, and once they’re drawn, we can move on to step 4 of the guide!
Step 4
This chain design is already beautiful and elegant! We need to add a few final sections and details in the next few steps, so let’s start with these items! For now, we will draw more beads. The next two will still be the smallest and, unlike all the others, will not have a smaller shape inside the outline.
Next, we draw two more shapes that are the same as in the previous steps. These are smaller than the beads from steps 1-3 but slightly larger than the ones you drew. When you’re done, the next step is where you can start on the final details!
Step 5
Before we add some colors in the last step of this tutorial on drawing a necklace, let’s first add the metal band to which the beads you have drawn will be attached. You can start this ribbon by drawing two small circles on either end.
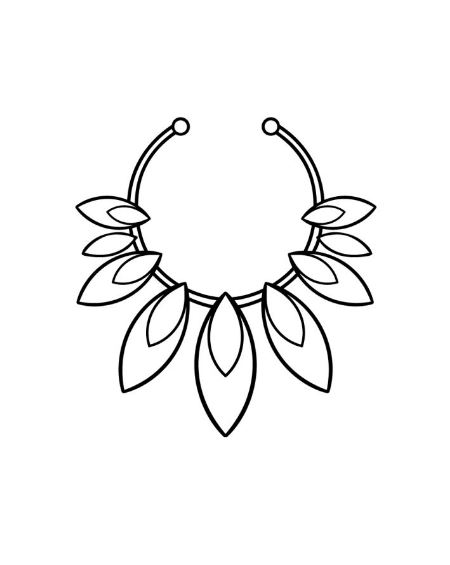
Then you can pull the thin thread into a curved shape to which all the beads will be attached.
Once this has been drawn, you can proceed to the final step! Before you do, this is your chance to add your decorations and ideas. These can range from adding more beads and objects to creating new bead designs. How will you finish this amazing drawing?
Step 6
This is the final part of the design of this necklace, and in it, we will finish with some colors. We have just shown you a few colors in our reference image. We used a good range of bright colors, such as oranges, blues, and purples.
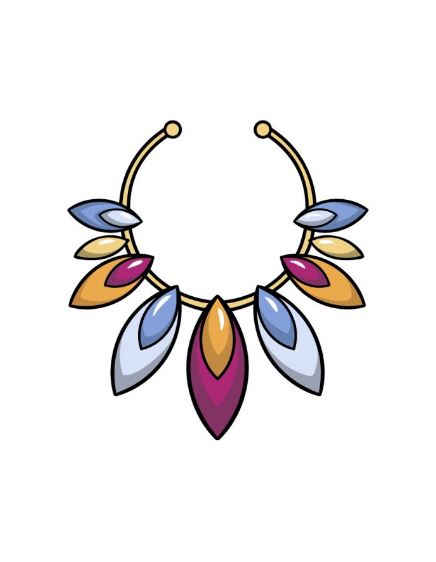
So while you can use similar colors, feel free to use some of your colors! Coloring is also a fun way to choose the artistic tools and mediums you use to make your color choices.
Your Necklace Drawing is Finished!